What is a terminal block?
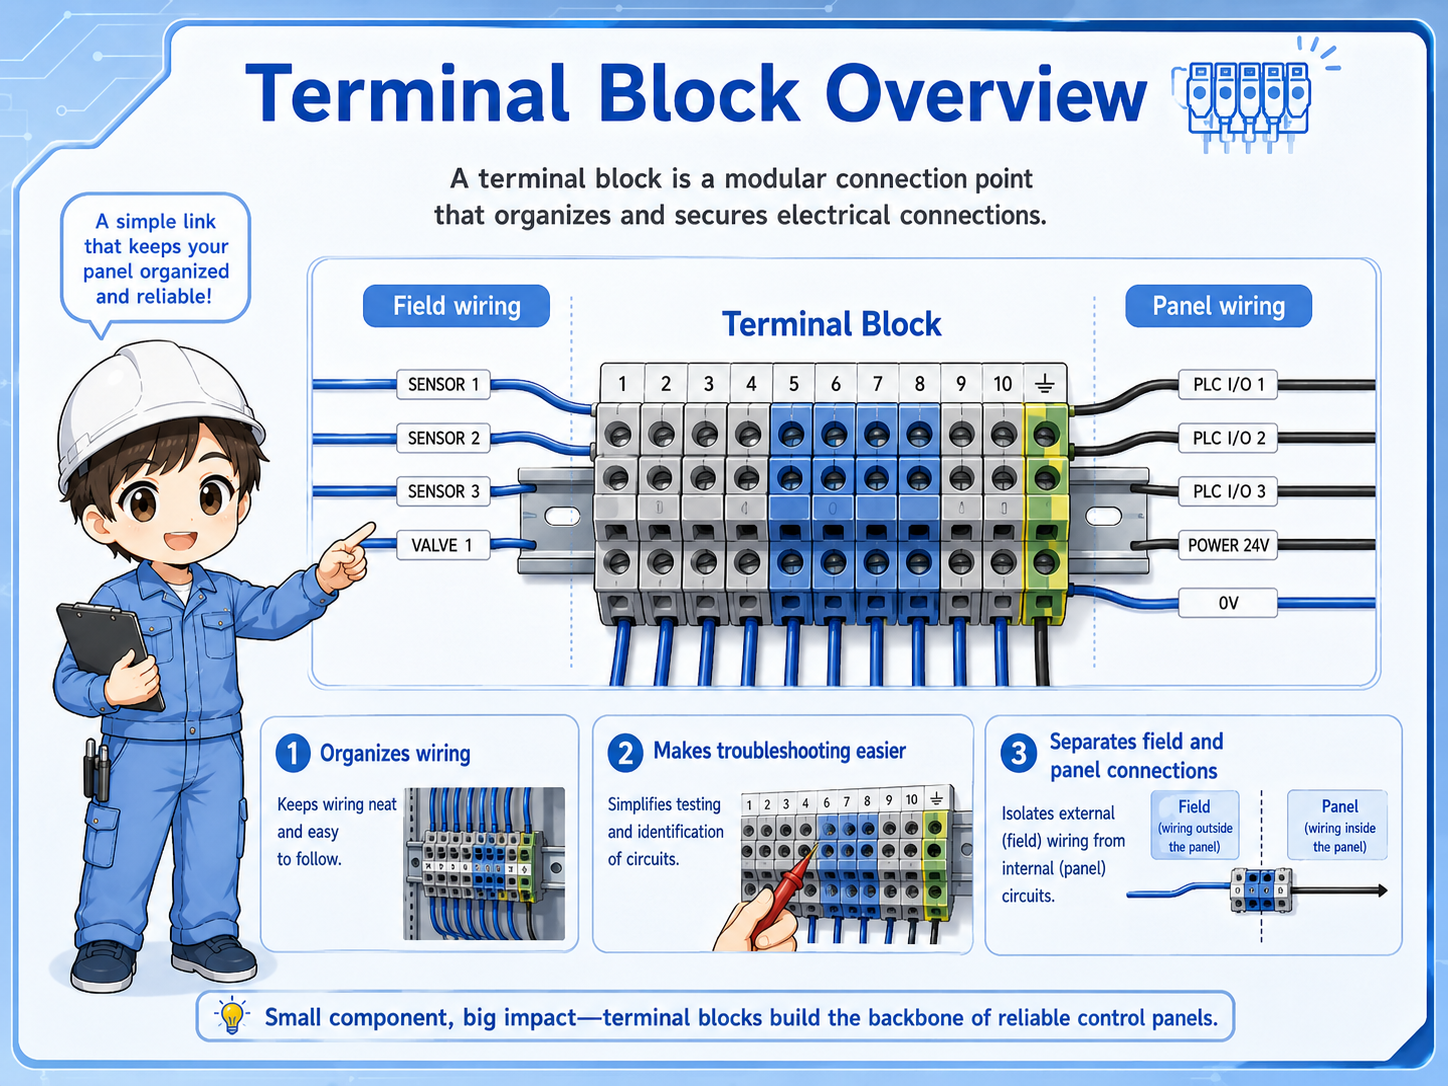
A terminal block is a wiring connection point used to organize and relay wires inside a control panel.
In a control panel, many wires come from field devices such as sensors, switches, solenoid valves, lamps, and motors. Other wires go to PLC inputs, PLC outputs, relays, power supplies, and internal control devices. A terminal block sits between those areas and makes the wiring easier to arrange, identify, and maintain.
Instead of connecting every field wire directly to a PLC or relay, the wires are often brought to terminal blocks first. This makes the panel easier to inspect and helps separate field wiring from internal panel wiring.
The simple way to think about it
A terminal block is like a clean relay point for wires. It helps you see where a field device enters the panel and where that signal or power goes next.
Why control panels use terminal blocks
Terminal blocks make wiring easier to organize, modify, inspect, and troubleshoot.
Without terminal blocks, field wires may be connected directly to many different devices inside the panel. That can make wiring harder to follow and harder to repair. Terminal blocks create a clear place where outside wiring and inside wiring meet.
Clear wiring boundary
They separate field wiring from internal panel wiring, making the panel easier to read.
Easier troubleshooting
You can measure voltage or continuity at a known terminal point.
Easier replacement
Field wiring can often be disconnected or reconnected without disturbing every internal device.
Better labeling
Terminal numbers and wire numbers help workers trace circuits from drawings to the real panel.

When you troubleshoot a panel, the terminal block is often one of the first places to check. It tells you where the field wiring enters the panel.

So it is not just a connector. It is also a useful checkpoint for reading the circuit.
Field wiring side and panel wiring side
A terminal block often connects wires coming from outside the panel to wires going to internal panel devices.
One side of the terminal block may be connected to field devices. The other side may be connected to PLC inputs, relay contacts, power supplies, or other internal circuits. The exact arrangement depends on the drawing and panel design, but the concept is the same: the terminal block gives the circuit a clear connection point.
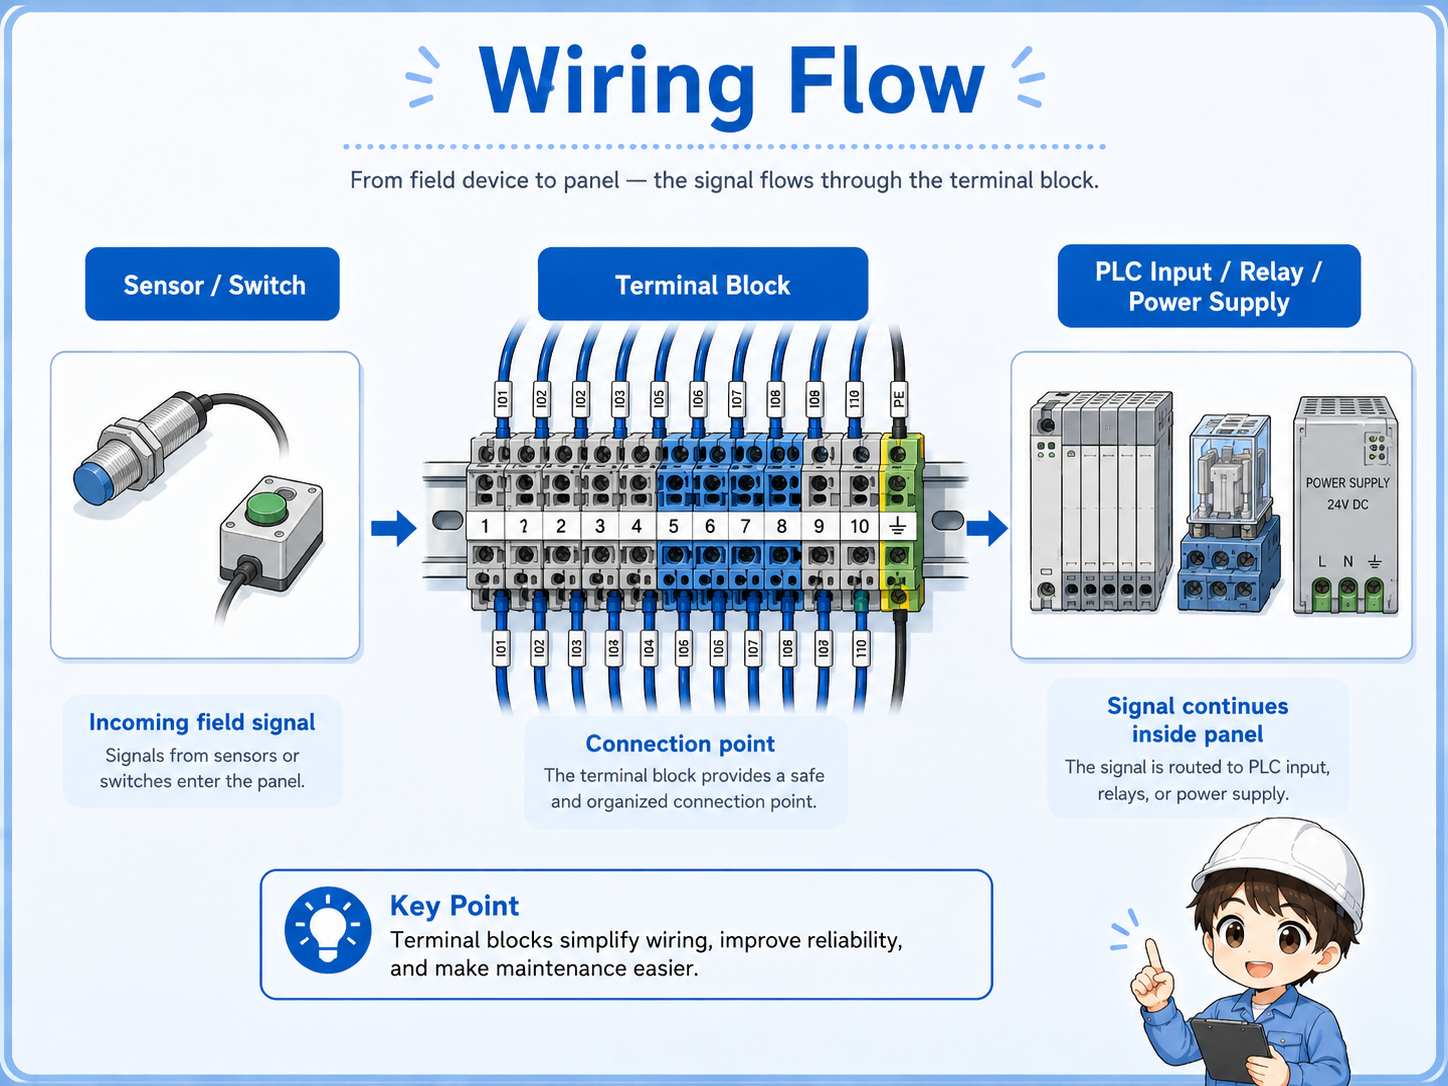
1. Field device
A sensor, switch, lamp, solenoid valve, or other field device sends a wire to the panel.
2. Terminal block
The wire is landed on a numbered terminal so it can be identified and checked.
3. Internal circuit
The signal or power continues to a PLC input, output, relay, power supply, or another device.
Terminal numbers and wire numbers
Terminal numbers identify the connection point, while wire numbers help identify each wire.
A terminal number is usually shown on the terminal block or its label. It helps you match the real panel with the electrical drawing. A wire number is attached to the wire itself and helps you trace where that wire belongs.
| Item | What it identifies | Why it matters in the field |
|---|---|---|
| Terminal number | The connection point on the terminal block. | Helps match the physical terminal with the drawing. |
| Wire number | The wire itself. | Helps trace the wire even when it leaves the terminal block. |
| Device label | The device connected to the circuit. | Helps connect the terminal to a sensor, switch, relay, PLC point, or field device. |
Do not rely on labels alone
Labels can be missing, old, or incorrect. When troubleshooting, use the drawing, terminal number, wire number, and actual measurement together.
Jumpers and common terminals
Jumpers are used when one electrical point needs to be shared across multiple terminals.
In many panels, terminals need to share a common power line, common 0V line, or common signal reference. A jumper links multiple terminals together. This can be convenient, but it also means one loose or wrong jumper can affect several circuits.
Important field point
If several devices fail at the same time, do not check only each device. Also check common terminals, jumpers, shared power, and shared 0V lines.
Be careful before moving a jumper
A jumper may feed multiple circuits. Never remove, move, or add a jumper based only on appearance. Check the drawing, voltage, and circuit purpose first.
Field checks around terminal blocks
When checking terminal blocks, look at mechanical condition, labeling, wiring, jumpers, and voltage.
Terminal block problems are often simple but hard to find: a loose screw, poor wire insertion, wrong terminal, missing label, wrong jumper, or no voltage at the expected point. A calm check order helps prevent guessing.
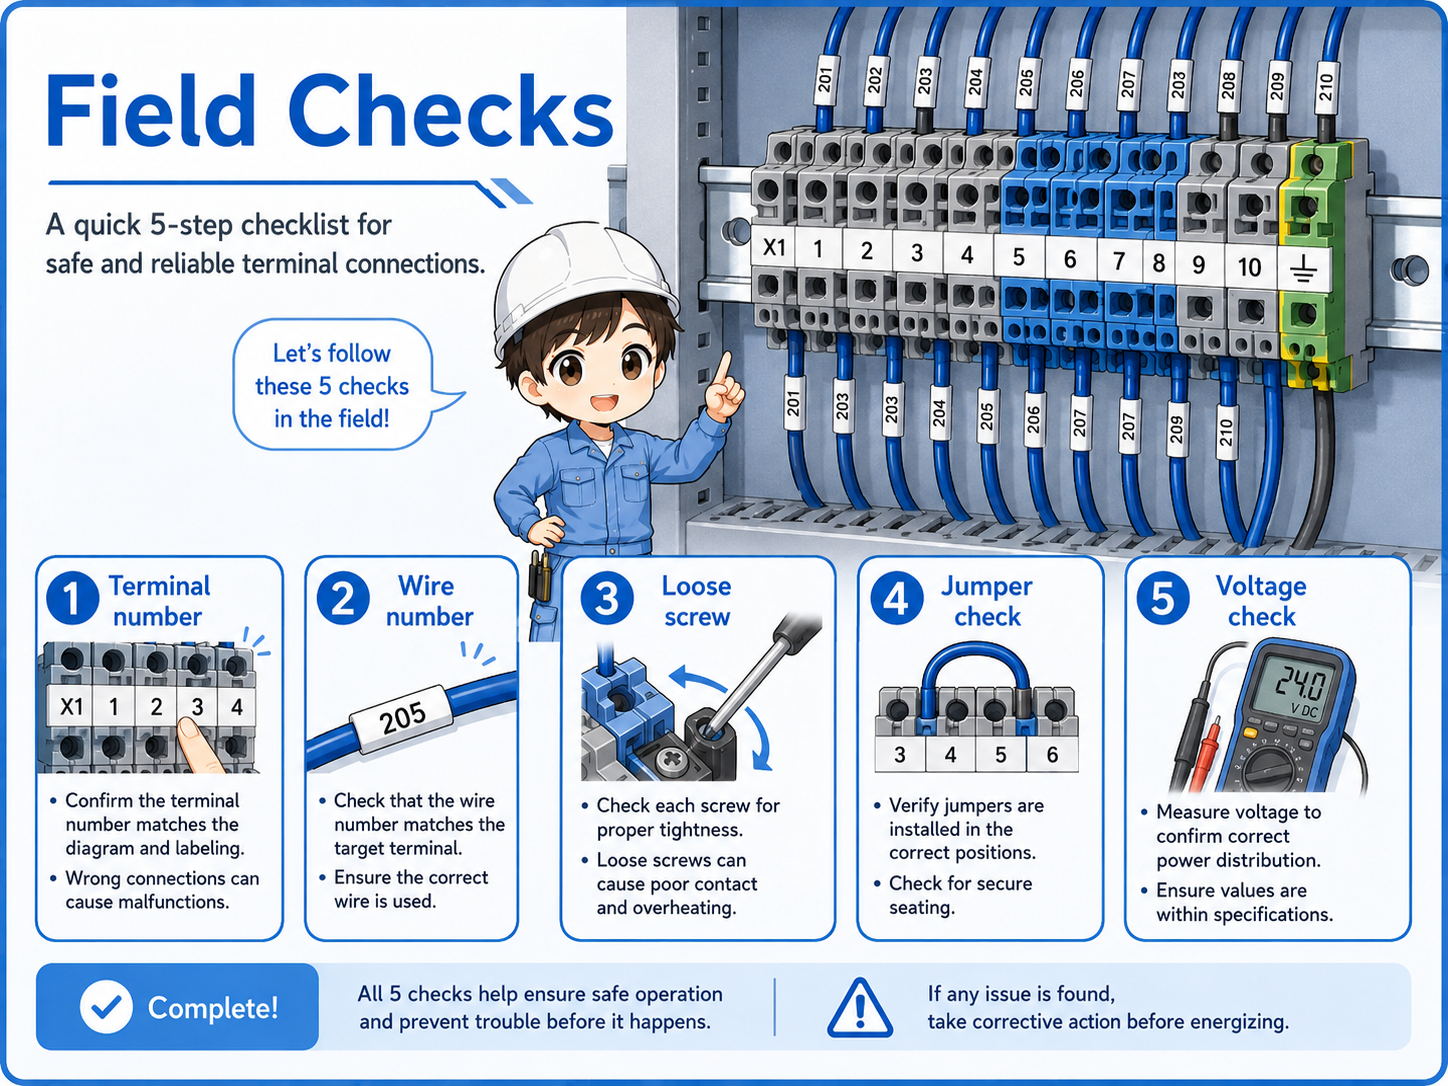
1. Terminal and wire numbers
Confirm that the real terminal and wire number match the drawing and the expected circuit.
2. Wire insertion and looseness
Check for loose screws, poor insertion, broken strands, or wires that can move unexpectedly.
3. Jumpers and common lines
Check whether jumpers are present, correctly placed, and not loose or damaged.
4. Voltage or signal check
Measure at the terminal when needed, and confirm both the field side and panel side of the circuit.
Common mistakes to avoid
Terminal blocks are simple parts, but mistakes around them can affect the whole circuit.
- Assuming a wire is correct only because the label looks right.
- Checking the PLC input but forgetting to check the terminal block first.
- Overlooking a loose screw or poorly inserted wire.
- Moving a jumper without checking the drawing.
- Mixing up field wiring side and panel wiring side during troubleshooting.
- Leaving spare terminals unlabeled or unclear for future workers.
Simple field mindset
A terminal block is one of the best checkpoints in a control panel. If you can read the terminal numbers and wire numbers calmly, troubleshooting becomes much easier.