What is a DIN rail?
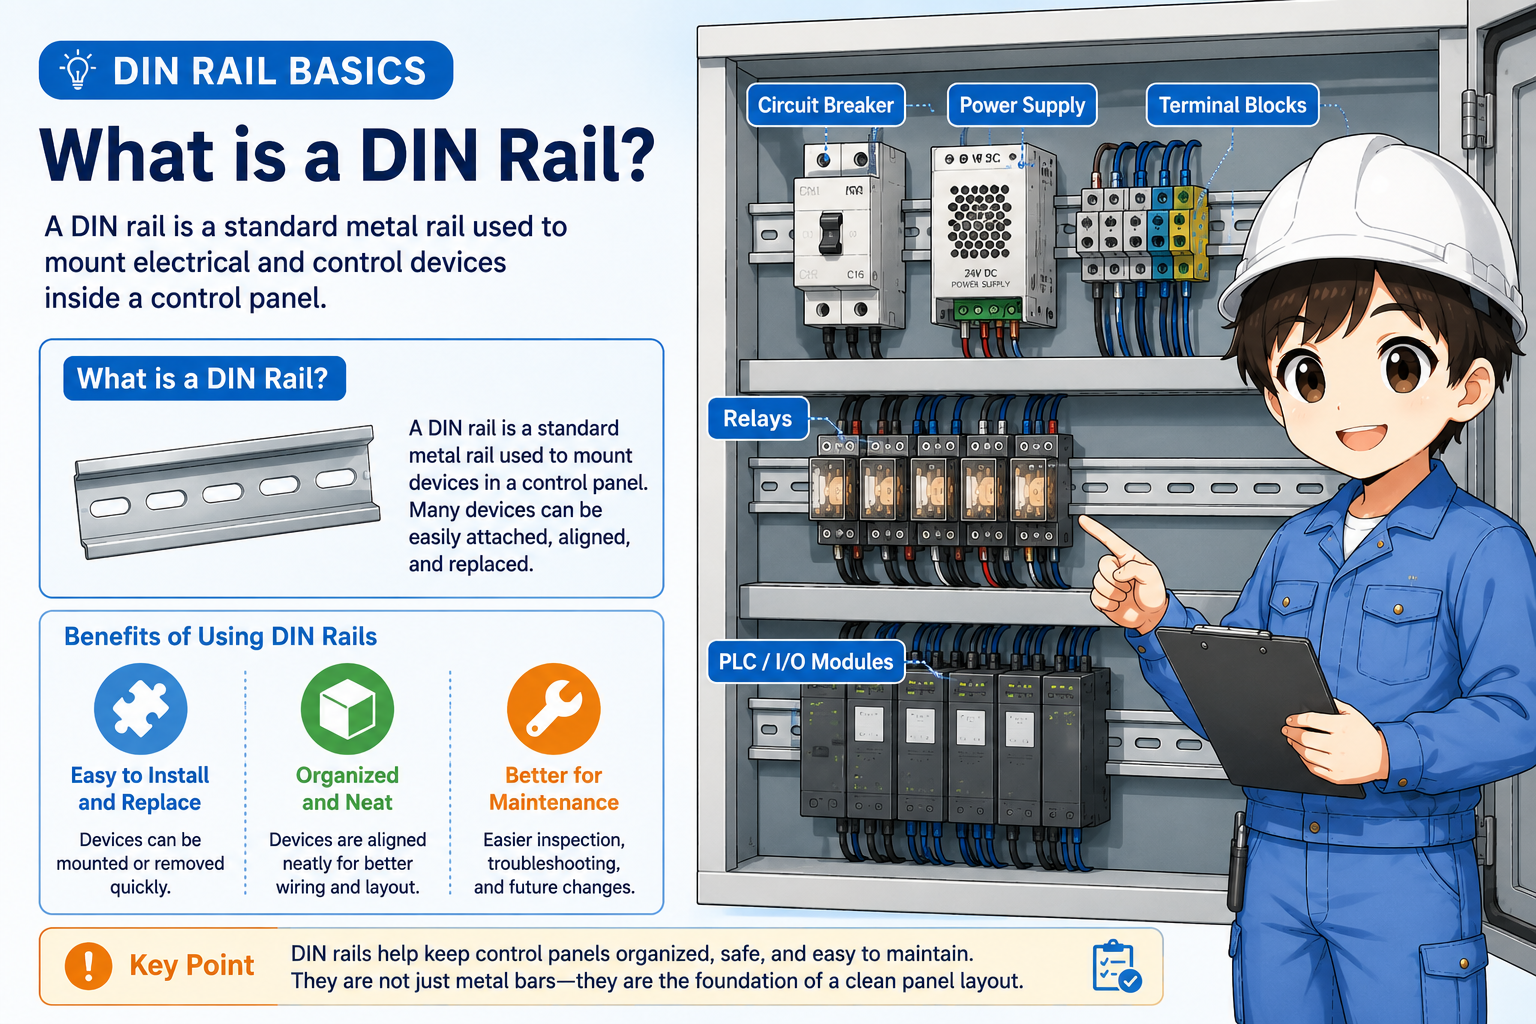
A DIN rail is a standard metal rail used to mount electrical and control devices inside a panel.
In a control panel, many small devices need to be installed in a limited space: terminal blocks, relays, PLC units, power supplies, breakers, interface modules, and more. A DIN rail gives these devices a shared mounting base.
Instead of drilling a separate mounting pattern for every device, many panel components can be clipped onto the rail. This makes the panel easier to assemble, modify, replace, and inspect.
The simple way to think about it
A DIN rail is like a standardized mounting track. Devices can be lined up, clipped on, moved, or replaced more easily than if each device were mounted directly to the panel plate.
Why control panels use DIN rails
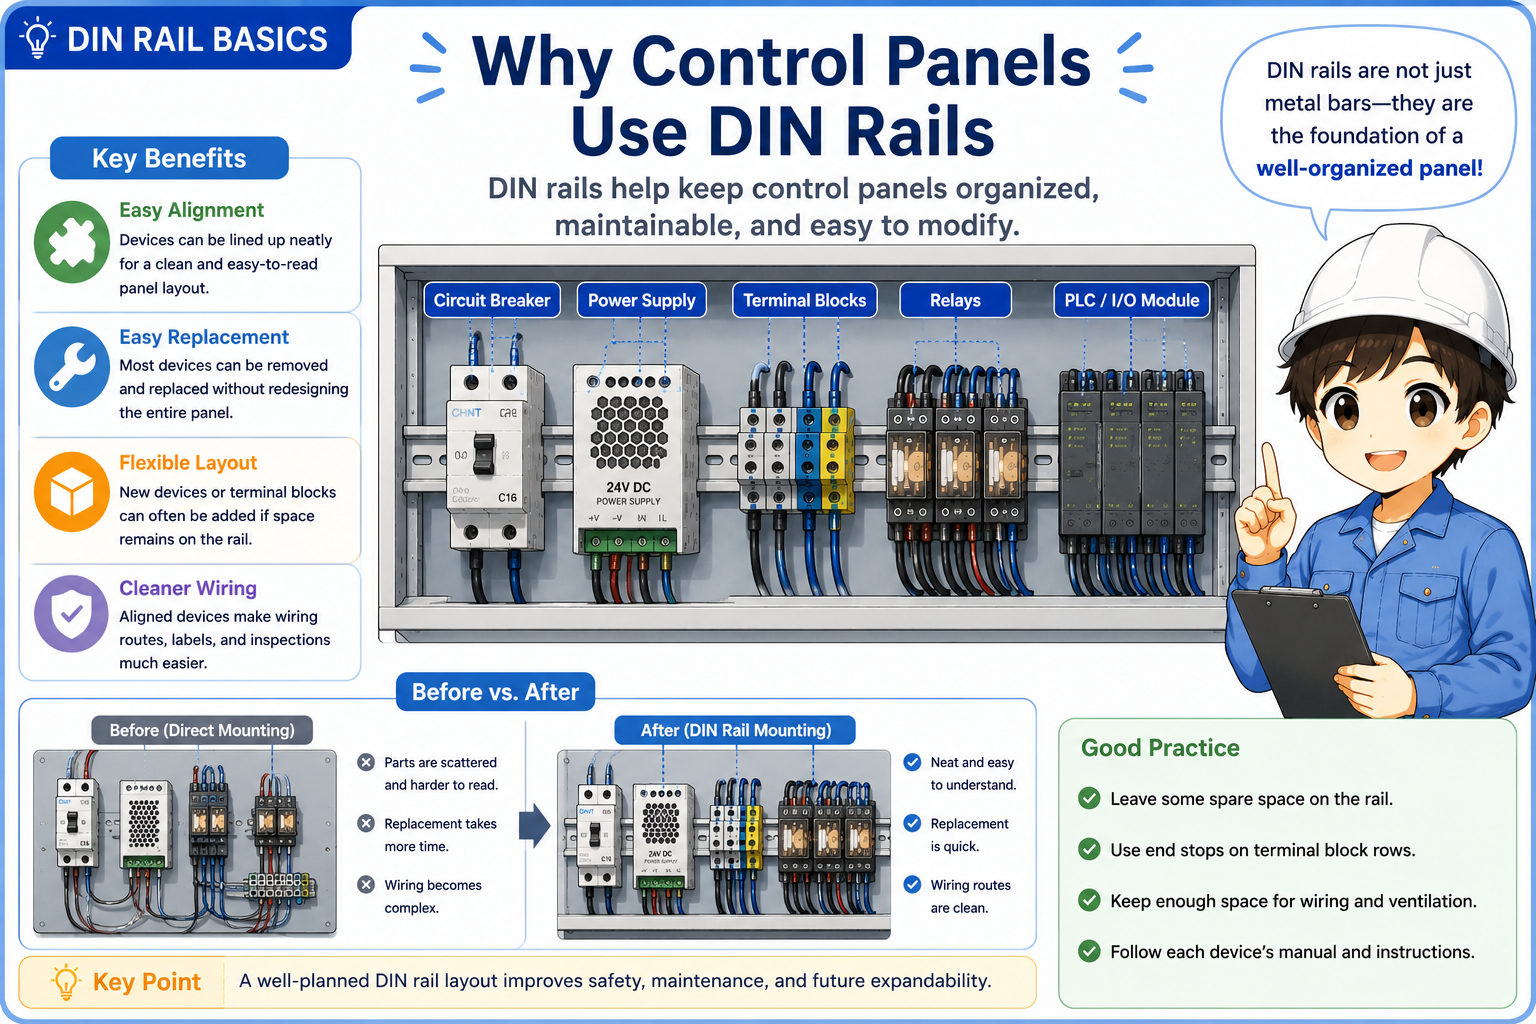
DIN rails help keep a panel organized, serviceable, and easier to modify.
The biggest benefit is not only neat appearance. DIN rails make it easier to build a panel in a repeatable way. When devices share the same mounting rail, the wiring route, spacing, labels, and replacement work become easier to manage.
Easy alignment
Devices can be lined up along one rail, which makes the panel easier to read and maintain.
Easy replacement
Many devices can be removed from the rail without redesigning the whole mounting plate.
Flexible layout
Additional terminal blocks or small devices can often be added if space remains on the rail.
Cleaner wiring
When devices are aligned, wire routes and labels are easier to follow during field checks.

When a panel is easy to read, troubleshooting becomes much faster. DIN rails help create that clean structure.

So it is not only for mounting parts. It also affects future maintenance and inspection.
Common devices mounted on DIN rails
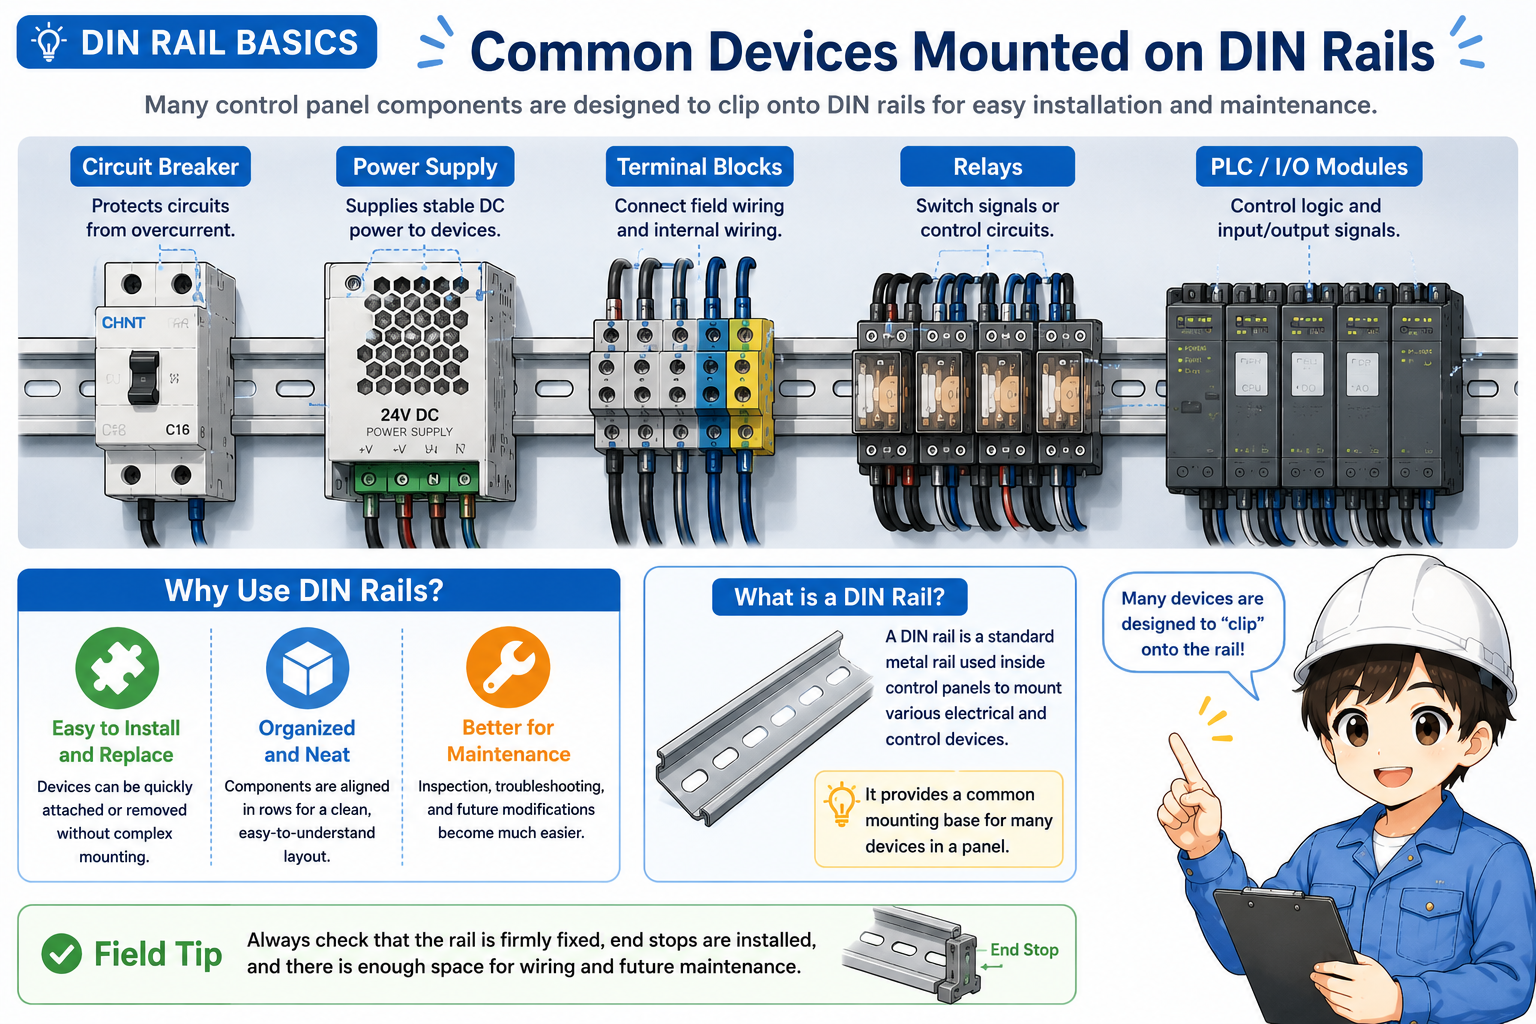
Many control panel components are designed to clip onto DIN rails.
The exact devices depend on the panel, but the following parts are often mounted on DIN rails. In many cases, a device has a spring clip or locking tab on the back that catches the rail.
| Device | Why it is mounted on a DIN rail | Field point |
|---|---|---|
| Terminal blocks | They are often arranged in a row to connect field wiring and internal panel wiring. | Check labels, end plates, jumpers, and loose screws. |
| Relays | Relay sockets can be aligned and replaced more easily. | Check socket locking, coil wiring, and contact wiring. |
| PLC units | Compact PLCs and I/O modules are often mounted in a row. | Check module locking, connector clearance, and cable bend radius. |
| Power supplies and breakers | Small power devices can be installed neatly with enough wiring space. | Check heat, terminal torque, and spacing from neighboring parts. |
DIN rail mounting vs direct mounting
DIN rail mounting is convenient, but direct mounting is still used when the device or structure requires it.
DIN rail mounting is common for small and medium control components. Direct mounting means fastening the device directly to the panel plate using screws. Some large, heavy, or heat-producing devices may be better suited for direct mounting.
| Mounting method | Good points | Be careful about |
|---|---|---|
| DIN rail mounting | Easy to align, replace, and modify. Good for many small panel devices. | The rail itself must be firmly fixed, and end stops may be needed. |
| Direct mounting | Good for larger or heavier devices, or devices with specific mounting requirements. | Each mounting pattern must be prepared correctly, and replacement may take more work. |
Do not decide only by appearance
Always follow the device manual and panel design requirements. A part that looks small may still have heat, weight, spacing, or grounding requirements.
Basic mounting flow
The basic flow is rail fixing, device clipping, spacing check, and wiring clearance check.
The actual procedure depends on the panel and the device, but the general idea is easy to understand. First the rail is fixed to the panel plate. Then devices are clipped onto the rail and arranged with enough space for wiring, heat, labels, and future maintenance.
1. Fix the rail
Mount the rail straight and firmly so it does not move when devices are attached or removed.
2. Clip the devices
Hook the device onto the rail and lock it according to the device structure.
3. Check space
Confirm wiring space, terminal access, heat clearance, labels, and future removal space.
Work safely
Do not install, remove, or touch control panel devices on live equipment unless the work procedure specifically allows it and proper safety measures are in place.
Field checks for DIN rails
A DIN rail problem often appears as loose parts, poor wiring space, or difficult maintenance.
During inspection, do not only look at whether the devices are present. Check whether they are firmly mounted, whether the rail is fixed, and whether there is enough room to work safely around the parts.
1. Rail fixing
Check whether the rail is firmly fixed to the panel plate and does not rattle or bend.
2. End stops
For terminal blocks and rows of small parts, confirm that parts cannot slide sideways unexpectedly.
3. Wiring space
Check whether wires can be routed without sharp bends, pulling, or blocking terminal access.
4. Removal clearance
Confirm that devices can be replaced later without having to remove unrelated parts unnecessarily.
Common mistakes to avoid
DIN rails look simple, but small layout mistakes can make maintenance harder.
- Filling the rail completely and leaving no room for future changes.
- Forgetting end stops on terminal block rows.
- Installing parts so close together that terminal screws or connectors are hard to access.
- Leaving poor wire bend space around power supplies, PLC modules, or breakers.
- Ignoring rail looseness, rust, deformation, or poor grounding where grounding is required by the design.
Simple field mindset
A DIN rail is not only a mounting part. It affects wiring, replacement work, labeling, and future troubleshooting. A clean rail layout makes the whole panel easier to understand.