What are control panel labels?
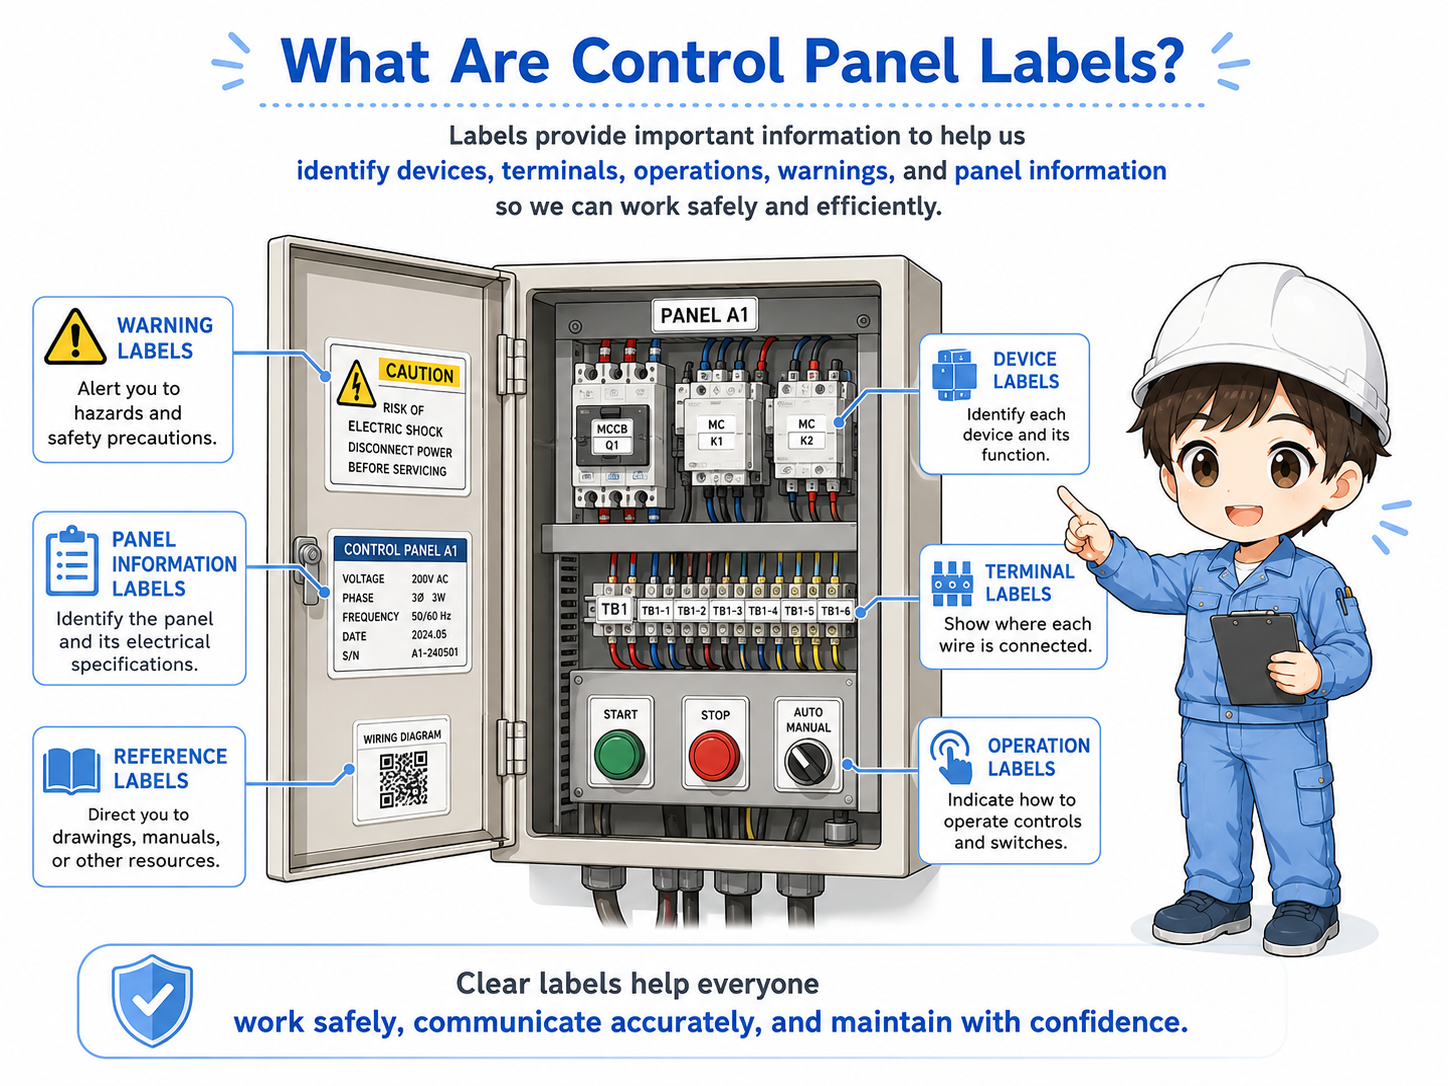
Control panel labels are visual markers that help identify devices, terminals, operations, warnings, and drawing references.
Inside a control panel, many devices and wires are arranged close together. Without labels, it becomes difficult to know which breaker, relay, terminal block, power supply, PLC unit, or button you are looking at.
Labels are used to make the panel easier to read. They help workers compare the actual panel with the electrical drawing, wiring numbers, device symbols, and operation names.
The simple way to think about it
A label is like a signpost inside the control panel. It does not replace the drawing, but it helps you find the correct device, terminal, or operation point faster.
Why labels matter in panel work
Good labels reduce confusion during wiring, inspection, maintenance, and troubleshooting.
When a machine has a problem, workers need to find the correct device quickly. Clear labels make it easier to locate the right terminal block, PLC I/O point, breaker, relay, lamp, switch, or power supply.
Labels also reduce mistakes. If a panel has multiple similar devices, a small label can prevent a worker from checking or disconnecting the wrong component.
Faster troubleshooting
Labels help you find the target device or terminal without tracing everything from the beginning.
Fewer wiring mistakes
Clear labels reduce the risk of connecting wires to the wrong terminal or device.
Easier drawing comparison
Device names and terminal names help connect the real panel with the electrical drawing.
Safer field work
Warning labels and operation labels help workers notice important information before touching equipment.

When labels are clear, you can compare the drawing and the real panel much faster. But if the label is old or wrong, it can mislead you.

So I should use labels as a guide, but still check the drawing and actual wiring.
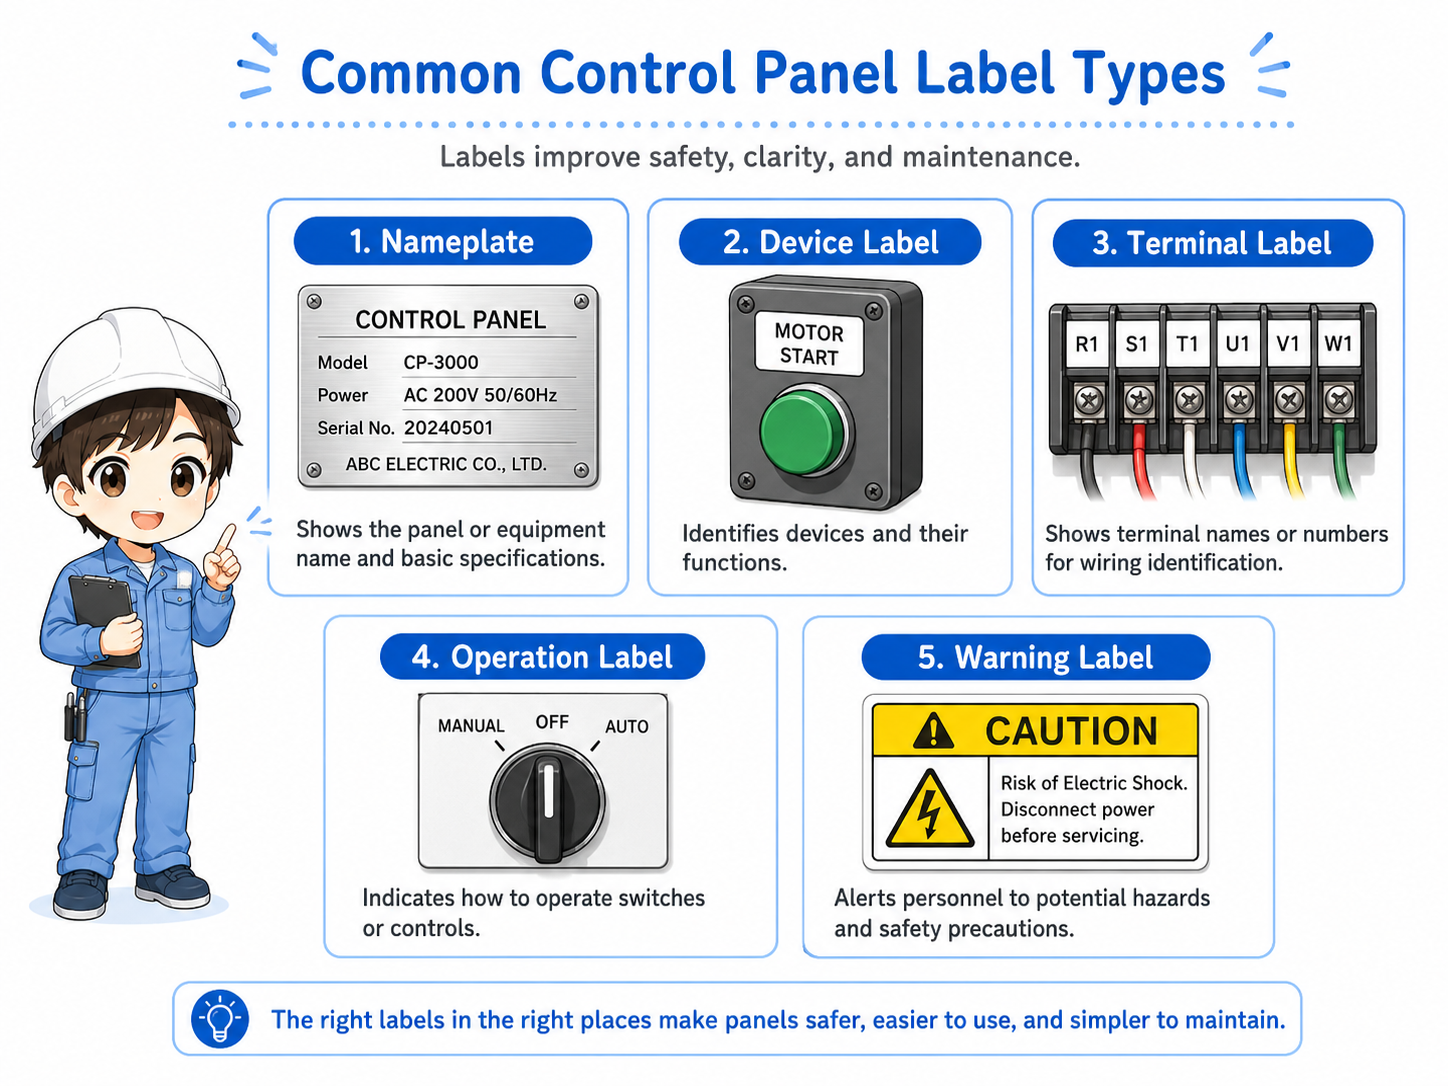
Common label types in a control panel
Control panels may include device labels, terminal labels, operation labels, warning labels, and nameplates.
The exact label style differs by company, machine, and panel builder. However, the basic purpose is similar: make the panel easier to identify and safer to work on.
| Label type | Where it appears | What it helps you check |
|---|---|---|
| Device label | Breakers, relays, PLC units, power supplies, contactors, inverters. | Which device corresponds to the drawing symbol or device number. |
| Terminal label | Terminal blocks, connector areas, PLC I/O terminals. | Which terminal number or signal point the wire should connect to. |
| Operation label | Push buttons, selector switches, pilot lamps, panel doors. | What the operator sees and what the switch or lamp means. |
| Warning label | Power areas, high-voltage sections, inverter areas, special caution points. | Important safety or handling information before work. |
Label names are not universal
The same device may be labeled differently depending on the drawing rule or customer standard. Always compare the label with the actual drawing and machine documentation.
How labels connect with drawings and wire numbers
A label is most useful when it matches the drawing, wire number, terminal number, and actual device.
In field work, labels should not be read alone. For example, a terminal block label may tell you the terminal group, but the wire number and drawing tell you the exact signal or destination.
When troubleshooting, use labels to find the area quickly, then confirm the details with the drawing, wire marker, terminal number, and measured signal.
1. Label
Use the label to find the device, terminal group, or operation point.
2. Drawing
Confirm the device symbol, circuit role, and drawing reference.
3. Wire number
Check the marker tube and compare it with the terminal or drawing.
4. Actual check
Confirm the real device, terminal, signal, or voltage condition.
Good field habit
If the label, drawing, wire number, and actual wiring all agree, your check becomes much more reliable. If one of them does not match, stop and investigate before changing wiring.
Field checks for control panel labels
Label problems are common after modification, repair, relocation, or long-term use.
A panel can still operate even when labels are missing, faded, shifted, or outdated. But during troubleshooting or modification work, label problems can cause wrong checks and wrong wiring.
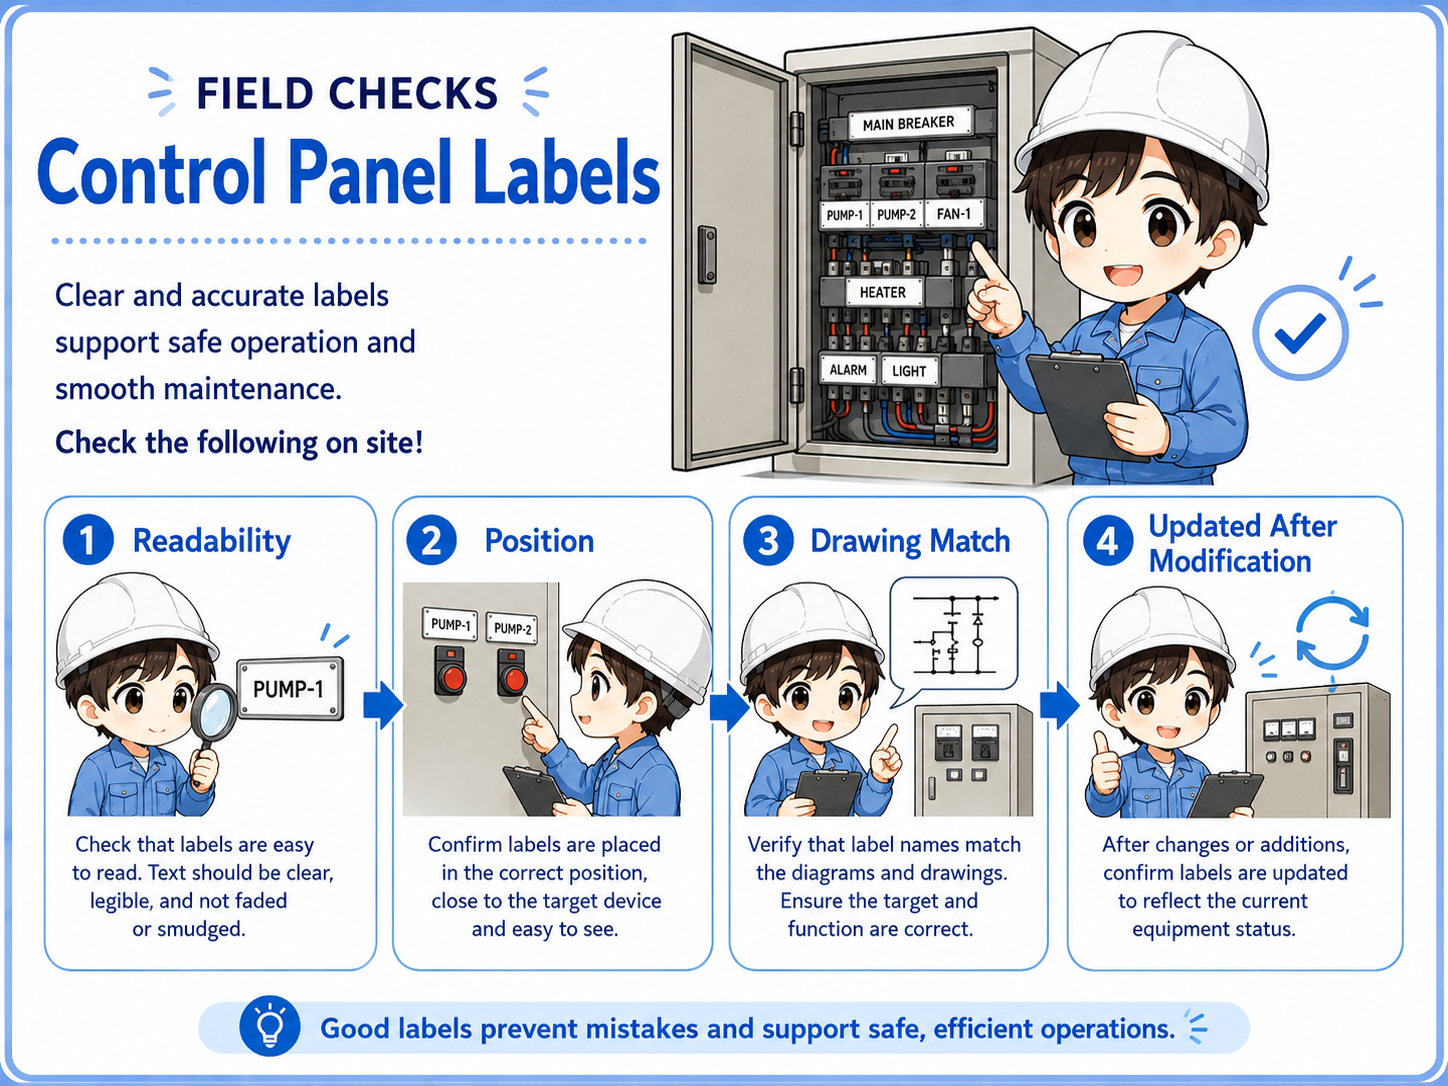
1. Check readability
Confirm that the label is not faded, damaged, covered, or too small to read in the field.
2. Check position
Make sure the label is close to the correct device, terminal, switch, or lamp.
3. Check drawing match
Compare the label name with the latest drawing, device symbol, and terminal number.
4. Check modification history
After repair or modification, confirm that the label was updated together with the wiring and drawing.
Do not trust a suspicious label blindly
If a label does not match the drawing, wire number, or actual equipment, treat it as uncertain. Confirm the real circuit before disconnecting, replacing, or energizing anything.
Common mistakes to avoid
Most label mistakes happen when old information is treated as current information.
- Assuming the label is correct without checking the drawing.
- Replacing a device but leaving the old label unchanged.
- Moving a wire or terminal block without updating the label.
- Using unclear abbreviations that only one person understands.
- Putting labels too far from the actual device or terminal.
- Ignoring faded, peeled, or damaged labels because the machine still runs.
Simple field mindset
A good label should help the next person understand the panel quickly. If the label creates doubt, check the drawing, wire number, terminal, and actual device before acting.